Written by Pinnacle Ambassador Ryan Siacci
It’s summer, and that means it’s too hot for climbing in Brisbane... but in New Zealand, tis the season for alpine wonderment! At this time of the year, folks are just getting ready to cross the ditch to tackle technical mountaineering objectives or learn the ropes on their first TMC.
But Australians are tropical fish, and if you’re a Brisbane native like myself, there’s a good chance that you’ve never winter camped. For us, winter camping means nipping out to Girraween and congratulating ourselves on hardcore status while we stoically brush a thin layer of morning frost from the tent. But true winter camping means making yourself comfortable among the snow and ice, and it demands an entirely new skillset.
True, summer mountaineering in New Zealand is no Siberian winter, but it’s plenty cold enough if you don’t have the knowhow or the right equipment. I’ve spent plenty of time in cold environments, including the Northern Patagonian Ice Cap and Alaska, and comfortable living was a steep learning curve for me. Here are some those tips and tricks which hopefully can lessen the steepness of that learning curve for those who aren’t yet initiated in the wonderful world of winter camping.
Nutrition
One of the great things about mountaineering and backcountry skiing is that the calorific and nutritional demands on the body are so high that you can eat whatever you damn well please and still maintain your svelte figure. Energy outputs for mountaineering will almost certainly exceed anything you can put into your mouth, so go ahead and eat portions which even Americans would consider excessive.
That said, you should still pay attention to the macro nutritional profile of your rations. A 60:30:10 ratio of Carbs:Proteins:Fats is often recommended, but this is only a rough guide and sometimes must be modified for different environments, altitudes and budgets. The ratio is never an exact science, but it’s a decent rudimentary framework for meal planning.
The metabolism is often likened to a fire, and each of the macro nutrients a type of fuel – carbs are kindling, proteins are sticks, fats are logs. You don’t start a fire by lighting a log with matches, so don’t try to eat a stick of butter for dinner. Conversely, a flame will flicker and die if the kindling isn’t eventually bolstered by bigger sticks, so don’t try to eat a bowl of plain rice either.
Rather, you need to try to balance each meal so that the fire burns merrily along. A meal that lacks key nutrients will make for a chilly night, no matter how good your sleeping bag is. Some folks with uber fast metabolisms even like to take a Snickers Bar to bed for a midnight boost – not recommended if you’re in bear country, however! But the lesson here is if you’re getting cold in the middle of the night, proper nutrition (and in all likelihood, more fat) is often the answer.
Hydration
Along with nutrition, adequate hydration is one of the keystones of good winter travel. A hydrated body perfuses the capillaries more efficiently, and for this reason, hydration is an essential line of defence against frostbite. Not only that, being well hydrated will make you feel warmer in general and contribute greatly to your mental well-being. Add these to all the usual reasons for drinking water (for example, not dying) and you can see why hydration is just as important in cold environments as it is in hot ones.
And yet, becoming dehydrated is one of the most common mistakes that people make in a winter camping scenario. There are two main reasons for this – the first is that melting snow for water is a slow and tedious chore, and the second is the cold often lessens the thirst mechanism while the dry mountain air draws the moisture right out of your lungs.
The solution for the first problem is easy – suck it up. Melting snow is part of life in the mountains. Have the discipline to make it happen, each and every night, even halfway through the day if need be. Take turns with your partner/s to spread the hurt.
There are a couple of ways to combat the second problem. One is to set a timer on your watch and commit to drinking every 30 minutes or so. Another is to add drink powder (e.g Gatorade or similar) to your water to make it more palatable than plain, cold water. This trick also seems to lower the freezing point of the water somehow… don’t ask me how, I’m not a scientist. Another idea is to cover your bottle in a neoprene coozy or put it in your jacket, which might stop it becoming a flavourless slushy or an unmeltable block of ice.
The Almighty Pee Bottle
Some folks are a little bit squeamish when it comes to the idea of the Pee Bottle, which is utterly laughable – if you can’t handle the idea of urinating into a bottle, you’re definitely too precious for mountaineering. On the other hand, some folks are a little bit too comfortable with the idea, like an unnamed accomplice of mine who not only took to using the aforementioned device at home, but subsequently purchased a larger model so that he might triple his efficiency. I would hazard a guess and say that the optimum scenario is somewhere in between these two outliers.
Using a Pee Bottle requires some delicacy, precision, and practice – doubly so if you have the misfortune of being a mountaineer without a penis. Even for ladies, the benefits of not having to leave your sleeping bag in sub-zero temperatures are worth the effort. If you think this manoeuvre is impossible for females, you’re wrong – I’ve known lady mountaineers with Jedi level Pee Bottle mastery.
Anyways, the important point is that holding it in is not a great option. Not only will your sleep be compromised, getting rid of all that excess liquid means less mass for your body to keep warm. Science. If you’re properly hydrated, particularly at altitude, you will definitely need to go at least once in the night.
Sacred Socks
Your socks will get wet during the day – that’s not opinion, it’s pure metaphysical certainty. Maybe it’s just me, but wet socks are more misery than I can possibly describe. The solution is to keep a pair of socks in your dry bag that never see the light of day and put them on as soon as you jump into your fart sack. I used to run a pair of knitted Yak wool socks that a friend bought back from Nepal, but they died, so I replaced them with a fancy calf-length Llama wool job from Peru… but a thick pair from the Op Shop will do just fine too if you’re light on coin. If you lay the damp socks between your sleeping mat and sleeping bag, your body warmth should dry them by morning, unless they are properly saturated, in which case you’re wearing wet socks tomorrow.
Down or Synthetic?
When it comes to fill for sleeping bags and jackets, down gets a lot of street cred. It’s warm, it’s compressible, its light, and when it comes to hauling gear on your back, light is right… or is it?
Down is expensive and worse than useless when it’s wet. Synthetic fill is cheap and will retain a great deal of its ability to keep you warm even when wet. Sure, there are hydrophobic downs these days, and many people put a great amount of faith in these materials without ever truly testing their lofty (pun intended) claims. In locations with high levels of precipitation (Patagonia, New Zealand, etc), I wouldn’t be caught without synthetic fill.
That said, if you spend time predominantly in dry climates, down is a superior choice. In a perfect world, I would have several different products for different uses. But it’s not a perfect world, and I can only afford one jacket and one sleeping bag, so synthetic it is.
Foam or Inflatable?
When it comes to sleeping mats, you’ll want both kinds if you’re sleeping on snow and ice. A closed-cell foam mat stops conductive heat loss, and an inflatable provides comfort, warmth, and also stops you from melting a groove into the floor. I’ve known others to run with an insulated inflatable mat on its lonesome, but I think the benefits of the foam mat are well worth the paltry increase in pack weight.
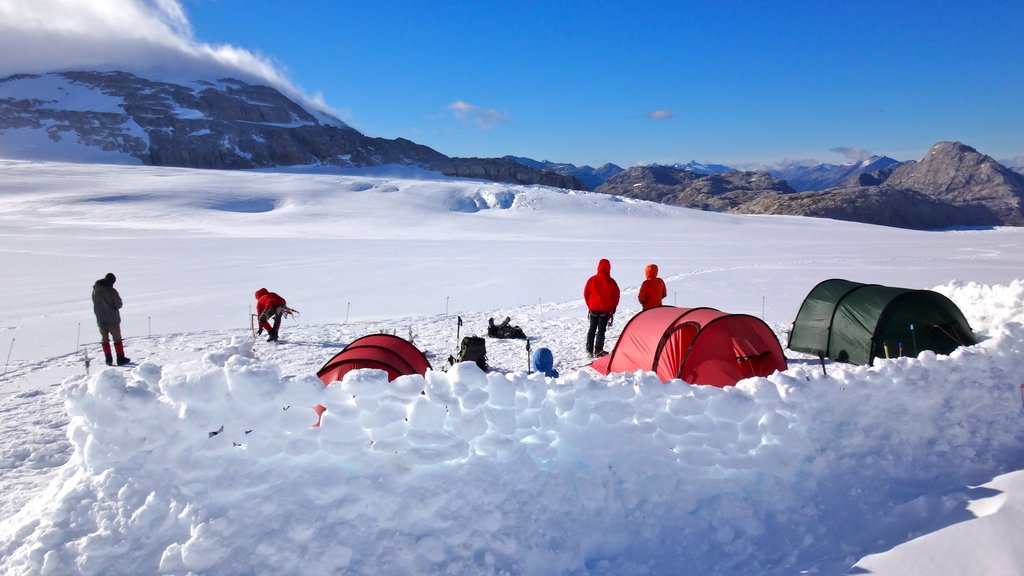
Making Camp
The beauty of winter camping is that you aren’t limited by the availability of water sources – there’s water everywhere! But when water forms snow and ice, it warrants different considerations. Firstly, you’ll need to probe the area thoroughly in case of crevasses, and it also pays to check the Alpha Angle. The free-floating pendulum needle in your compass can be used to measure the angle between you and the highest point at which snow or ice can fall from – an angle of less than 20 degrees is ideal. In a perfect world, you’d also like the terrain to shelter you from the elements, but sometimes you’ll have to build your own shelter.
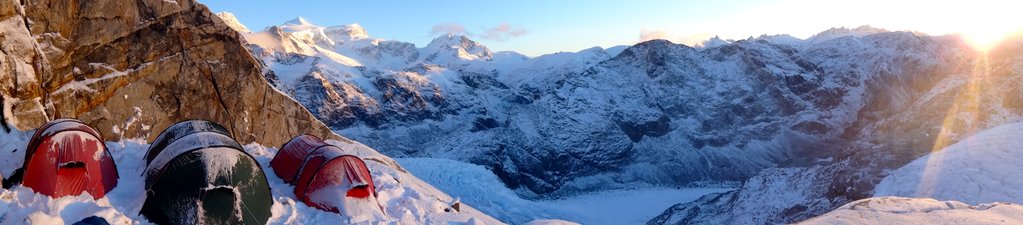
When it comes to snow shovels, you have two options - either buy a model with the longest handle you can find, or find yourself a very good physiotherapist. I seriously can’t stress this enough, because it takes far longer to build a good wind wall than one might think. Build it high, wide and strong, because there’s nothing worse than having to get out in the middle of the night to reconstruct your lame wind wall that blew over (like the one in the picture below...) Glacier Mountaineering by Andy Tyson and Mike Clelland has some awesome illustrated information on the construction methods for several different snow shelters.
The Kitchen
While you’re digging, why not renovate your kitchen? Constructing a communal kitchen or digging out the space underneath your tent vestibule makes life considerably more comfortable for the chef, especially if you drape a foam mat over the edge of the gap to ward off frostbite of the buttocks. You can even dig out shelves for your stove and spice rack, as well as storage compartment/fridge for food or a dromedary bag. A good kitchen is well worth the time and effort it takes to construct, especially if you’re staying put for a few days, and makes the laborious process of melting snow that much easier.
The Outhouse
You’re still not finished with the shovel, because while you’re at it, dig out a latrine and build a small wall around it. Ever tried obeying the call of nature into a plastic bag in 100km/hr winds without the aid of a wall? I don’t recommend it. If you can situate the latrine above a convenient crevasse (small enough that you won’t fall into it, but big enough for efficient bomb disposal), you’ve hit the jackpot.
Hot water bottle
Last but not least, the humble hot water bottle is a time-honoured winter camping technique. Use a Naglene, and make sure you screw the lid on tight!
Happy winter camping, and remember, it doesn't have to be fun to be fun!
Looking for more great reads? Subscribe to our newsletter to stay up to date with the latest climbing tech, crag recommendations and upcoming events.